Proper Use of a Hip Band or Hip Circle
If you’ve been in physical therapy for lower body issues you have likely used a TheraBand or other resistance circle around your legs. The exercises with this are numerous and include all positions from laying down, to standing , to balancing one leg. While the variety can be fun to explore, I wanted to take a minute to talk about why we use them and how to get the most benefit.
First, why do we use bands?
The obvious reason is to add resistance and gain strength, in the legs, when wrapped around the thighs, knees, or ankles. But there is more to it than just putting it on. When used correctly you will strengthen deeper hip muscles that rotate the hip joint. And if close attention is paid to the alignment to be discussed, they can be very influential in keeping the joints ‘centered’ and reduce wear and tear from poor ‘centering’.
Second, how do we use them correctly?
By paying attention is a start. It is oversimplified to say we are strengthening the hips with a ‘hip circle”. We are actually engaging all the muscles that the hips need to function properly. That includes the trunk or core, the feet and ankles, the knees, even your head and shoulder alignment.
Third, what are the main check points I can use to know if I am using a band correctly?
Great question, and ultimately the most important.
I suggest these check points to keep it simple :
-
Your feet and ankles:
When lying down, and especially when standing up you should keep a good ‘tripod’. The tripod includes even pressure in the heel, the little toe, and the big toe. Emphasis on ‘even’ pressure when you start. In fact just stand or lay on your back with knees bent and “pay attention”. With knees bent and band on, notice if you have even pressure on heel center, little toe, and big toe. As an awareness activity, move the pressure around with subtle changes so that more pressure is on heel than on toes, then on little toe side more than big toe side, then on big toe side more than little toe side. Once gone around try to put even pressure on each of the ‘tripod locations’, in both feet.
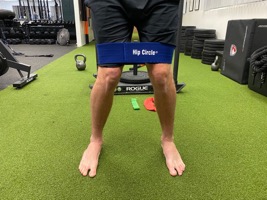
Do you see what I see?
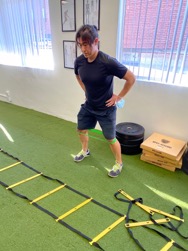
The first picture shows the knees close together and the ankles out wider. You could imagine from this there is more pressure on the big toes than the little toes. In this position, transferring the pressure to the outside toes brought the knees out in line with the ankles. That is the ‘strength’ value for the glutes / buttock that controls much of that action. When the knees fall in, the glutes are lagging and underutilized. When asked to transfer the weight to the outside toes those glutes activate and the band does it work ‘resisting’ so that they get stronger.
-
Your trunk, look in a mirror:
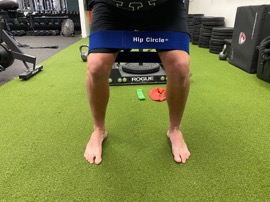
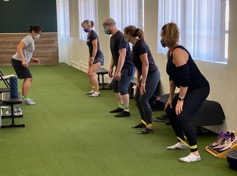
Make sure your shoulders and torso stay in the middle. We can think of a line down the middle and keeping the head, shoulders, and rib cage centered over the line even when you move the feet against the band. If you stay ‘centered’ with your trunk, you will use your glutes more. They will strengthen more. If you lean or tilt your shoulders, you will lose an opportunity to strengthen your glutes and legs. In the picture of Isak below, note that his shoulders seem relaxed, his torso is in the middle and looks solid. When he takes steps sideways, or any direction, he maintains that to get the most out of strengthening his legs – and buttocks.
-
Your butt = )
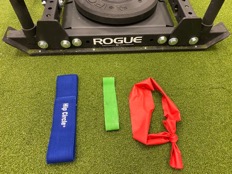
When using the band, up around the thighs is easier, just below the knees is a little harder, and around the ankles can be the hardest due to the longer lever arm of resistance from the butt muscles. But when you do the exercise, keep your butt ‘stuck out’, sometimes we say like a duck. If you tuck your buttock under you will lose the effect of strengthening the glutes and over strain the knees.
-
Last checkpoint: Tempo.
If you are taking steps or moving the feet, keep a good , slower cadence. If you go fast you will lose alignment awareness. It takes more strength to go slower. It is harder to place your feet correctly if you go fast.
So, get a left , right, left, right, cadence. Or any other cadence. But keep it in a good tempo.
Go slower and be aware.
Keep your 1. feet , 2. trunk, and 3. butt in-line and enjoy the results.
Dave is the owner and founder of Evergreen Physical Therapy Specialists. He and his wife Tammy, an RN at CHLA, opened Evergreen over 15 years ago to provide the community of Pasadena with specialized and compassionate care. David has over 25 years of experience in orthopedics, neuro-rehabilitation, and pediatric physical therapy.
Stay connected with news and updates!
Join our mailing list to receive the latest news and updates from our team.
Don't worry, your information will not be shared.
We hate SPAM. We will never sell your information, for any reason.
